
If you’ve been on X in the last 48 hours, you’ve probably seen the viral “AI Food Fails” thread. The images are a masterclass in the uncanny valley: cheese that looks like plastic, physically impossible noodle structures, and glistening sauces that just feel… wrong. It’s a perfect summary of the frustration countless restaurants, CPG brands, and food bloggers feel. You try to create an amazing shot of your signature dish, and the AI returns something that would fail a health inspection.
The problem isn’t the models. With Midjourney v7.1 and Stability’s new SD3-Gourmet model both dropping on July 2, 2026, the raw power to render realistic textures has never been better. The problem is the approach. Asking an AI to generate a specific dish from text alone is a gamble. You’re hoping it understands the exact way your cheese melts or how light reflects off your signature glaze. It’s a broken workflow.
The professional method flips the script: stop generating the food, and start styling it. This guide walks you through the exact workflow to take a simple smartphone photo of your actual product and use AI to build a world-class photoshoot around it.
The professional workflow: start with your real product
The secret to delicious-looking AI food photography is to give the AI an anchor in reality. Instead of a text prompt like “a juicy cheeseburger on a wooden table,” you start with an actual photo of your cheeseburger. This is called an image-to-image workflow.
Why does this work so much better?
- Authenticity: It’s your real product. The specific texture of the bun, the exact shape of the patty, the way your ingredients are layered—it's all preserved. You’re not getting a generic, imaginary burger; you’re getting yours.
- Control: You control the most important element—the food itself. The AI’s job is no longer to guess, but to enhance. It adds the perfect lighting, an ideal background, and professional props that you might not have access to in your kitchen or restaurant.
- Realism: By grounding the generation in a real photograph, the final image is far more believable. The AI has a real-world reference for light, shadow, and texture, which eliminates that plastic, artificial look.
In MyUP, this isn't a complex technical process. It’s a straightforward workflow designed for creators and marketers, not AI researchers. You provide the hero—your dish—and MyUP builds the perfect stage for it.
Step 1: Take one simple, well-lit photo of your dish
You don't need a professional DSLR camera or a studio setup. Your smartphone is more than capable of capturing the base image you need. The goal isn't to take the final, perfect shot, but to create a clean, clear starting point for the AI.
Here are a few tips:
- Use natural light: Find a spot near a window. Soft, indirect daylight is the most flattering for food. Avoid harsh overhead kitchen lights, which can create ugly shadows.
- Keep the background simple: Place your dish on a neutral surface like a plain countertop, a simple plate, or a piece of parchment paper. A cluttered background makes it harder for the AI to isolate your product.
- Focus on the food: Get close enough to capture the details. Make sure the most appetizing part of the dish is in sharp focus. Tap your phone screen to set the focus point.
That’s it. A simple, clean shot is all you need to feed the workflow. Don't worry about propping or styling—the AI will handle that.
Step 2: Build the perfect scene in seconds
Now you’ll take your simple photo and place it into a professional setting. This is where you can instantly create scenes that would normally require a food stylist, expensive props, and a dedicated studio space. You can try out dozens of concepts—from a rustic farmhouse table to a modern minimalist cafe—in minutes, not days.
In MyUP, this is a one-step process. You upload your photo and describe the scene you want to create around it. You can specify the mood, lighting, and environment, and the AI will seamlessly blend your real product into a newly generated, photorealistic scene.
The easiest way to do this is with a dedicated workflow that handles all the technical details for you. This template is built specifically for this task.
Workflow code: #myup-w0vh-abft
Food Product Ad
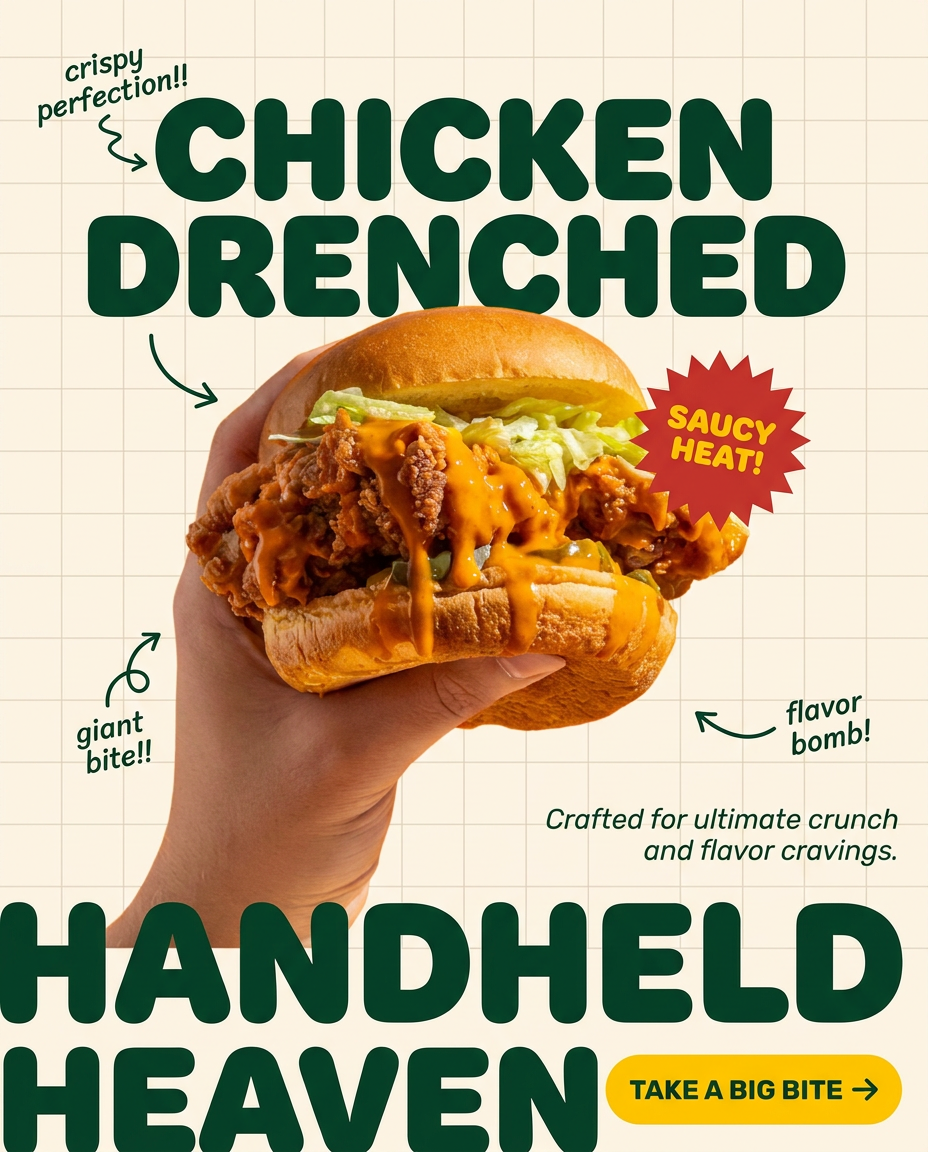
Turn any dish or snack into a bold, playful social ad. It places your food against a soft warm beige background with a subtle grid pattern, topped with chunky rounded headlines. It's clean, friendly, and instantly grabs attention in the feed.
Regenerate using your own assets.
You upload your photo, describe the background (e.g., “a dark, moody restaurant table with a cocktail in the background” or “a bright, sunny picnic blanket with fresh fruit”), and MyUP generates the complete image. You get the control of a real photoshoot without the cost and complexity. This same technique is the foundation of creating entire e-commerce catalogs, as we cover in our AI product photography workflow guide.
Step 3: Add the details that make it delicious
Sometimes a static shot isn’t enough. What makes food photography truly irresistible are the dynamic details: the wisp of steam rising from a hot dish, the perfect drip of syrup, or the glistening condensation on a cold drink. On forums like Reddit, users are developing complex, multi-pass techniques using several tools to achieve these effects. It’s powerful, but it's also incredibly time-consuming.
A better workflow automates this. Instead of manually adding layers, you can use a specialized template designed to add these appetite-appealing elements. You can instruct the AI to add “a gentle wisp of steam” or “a single drop of melted cheese dripping down the side,” and it will integrate it realistically into your scene.
For example, this workflow is designed to create a dynamic, perfectly styled shot of a seemingly simple product, making it look like a gourmet advertisement.
Workflow code: #myup-fts6-4ihp
Vertical Gourmet French Fry Ad
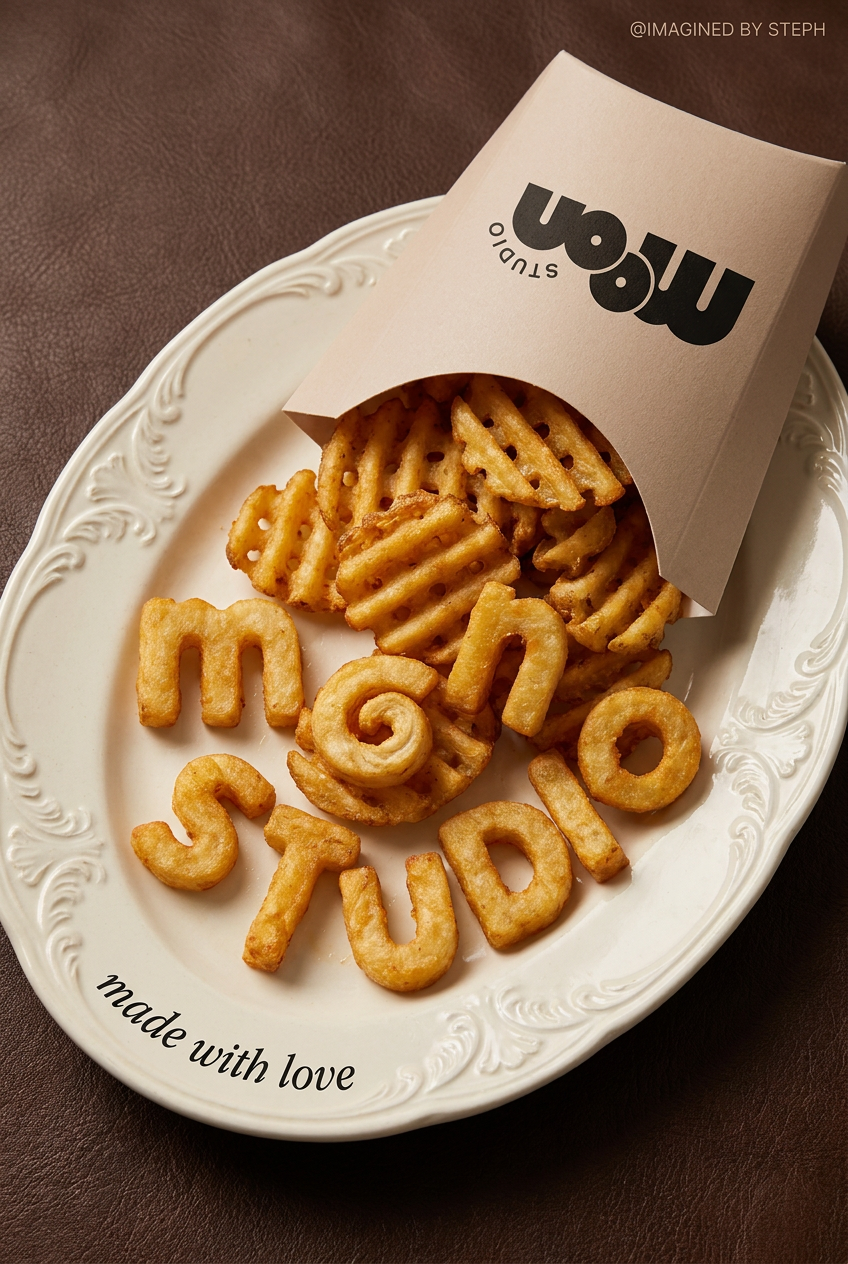
Transform your products into high-fashion editorial ads. This setup uses a dynamic diagonal layout and a slightly tilted overhead angle to give food and packaging incredible depth and texture. It's perfect for giving any brand a chic, premium look.
Regenerate using your own assets.
This is where AI elevates your real product beyond what a simple photo could achieve. The user validates the result, but MyUP handles the complex production of making it look perfect.
Step 4: Turn your photo into an on-brand campaign asset
A single beautiful image is great, but a business needs a campaign. You need multiple images for social media, your website, menus, and ads—and they all need to feel like they belong to your brand. This is where standalone AI image generators fall short. You might get a great shot once, but getting a second one in the exact same style, with your brand's colors and typography, is nearly impossible.
This is why a workflow platform is essential. In MyUP, your Brandkit is automatically applied to your creations. Your brand’s specific colors, fonts, and logo are stored and can be added to any image, turning a great photo into a finished marketing asset instantly.
Imagine creating a dozen different scenes for your burger, then applying your logo and a promotional headline in your brand’s font to all of them with a single click. That’s the power of an integrated workflow. You can go from a simple photo to a complete, on-brand poster ready for print or social media.
This template, for example, takes a generated food image and turns it into a fully designed poster ad.
Workflow code: #myup-1hgd-9oz5
Retro Style Food Advertising Poster
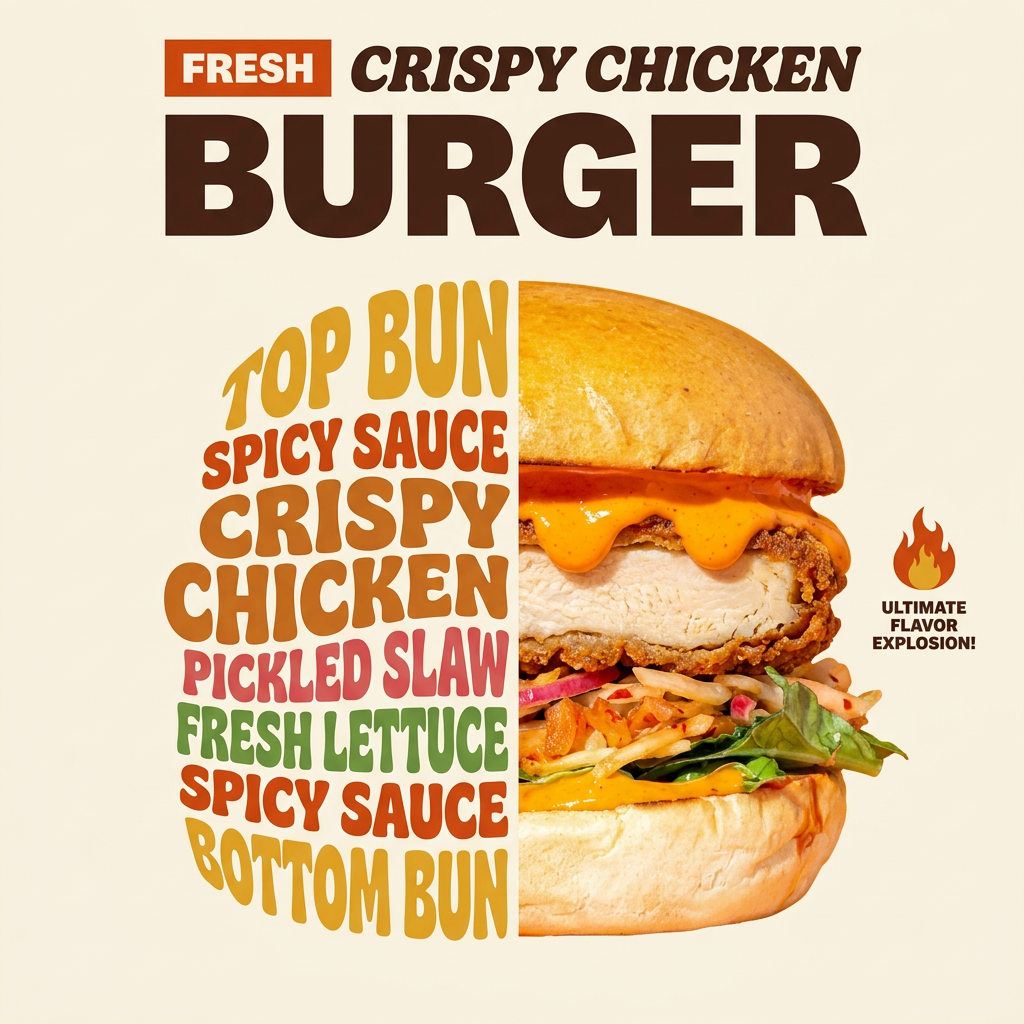
Turn any food product shot into a bold, nostalgic retro advertisement. It drops your item onto a warm cream background and automatically frames it with a color-matched header badge for that classic mid-century print ad look.
Regenerate using your own assets.
Your new content engine for food marketing
The viral AI food fails aren't a sign that AI is bad at food photography. They're a sign that people are using the wrong process. Stop trying to describe your food to a machine and start with the real thing. The workflow is simple:
- Photo: Take a clean shot of your actual dish.
- Scene: Use MyUP to build a professional scene around it.
- Brand: Apply your Brandkit to turn it into a consistent campaign asset.
This approach gives you the best of both worlds: the authenticity of your real product and the creative power of AI. It’s a repeatable, scalable system for creating an endless supply of high-quality, on-brand food photography. You’re no longer just a user prompting an AI; you’re a creative director guiding a production process. Try the workflows in this guide on MyUP and see how quickly you can create food content that actually looks delicious.
