On August 12, 2026, Stability AI released Stable Diffusion 3.5, and the first examples showcased a big leap in photorealism. The promise was clear: better lighting, more accurate reflections, and an end to that generic, plastic look. But if you’ve spent the last day running your own product prompts, you might have noticed a familiar problem. Even with a more powerful model, many shots still come out looking… flat.
The reason is simple. Better defaults don’t equal creative control. A new model might understand light better, but it can’t read your mind. It doesn't know you need a soft key light from the left to highlight the texture on a leather wallet, or a subtle backlight to make a glass bottle glow. To get results that sell, you need to stop asking the AI for 'photorealism' and start directing it like a photographer. This guide shows you how.
New models, same old problem: Why your AI product shots are still flat
The core issue isn't the AI's ability to render light; it's the lack of specific direction. When you just prompt for 'a photo of a skincare bottle on a marble surface,' the AI makes a guess. It usually defaults to a safe, evenly lit scene because it's the most common type of image in its training data. The result is a picture that's technically competent but emotionally dead. There's no drama, no focus, and no texture. It’s an illustration of a product, not a photograph that creates desire.
Professional product photography is a game of millimeters and degrees. Photographers don't just point and shoot; they shape light. They use key lights to define the subject, fill lights to soften shadows, and backlights to create separation from the background. This deliberate control is what gives an object form, texture, and a sense of place. Until now, replicating that control in AI required ridiculously complex prompts that were difficult to write and nearly impossible to replicate consistently. The industry is moving toward giving users more control—Adobe's recent 'Structure Reference' feature in Firefly is another signal of this trend—but it's often piecemeal. What you need is a system built for control from the ground up.
Stop prompting 'photorealistic' and start directing the light
Before you can fix the problem, you need to speak the language of light. You don't need a degree in photography, just a few core concepts that will completely change how you approach generating images.
Hard light vs. soft light
This is the most important distinction. Hard light (like direct, midday sun) creates sharp, well-defined shadows. It’s dramatic and intense, great for creating contrast and sharp edges. Soft light (like an overcast day or a professional softbox) creates gentle, diffused shadows with soft edges. It’s flattering and clean, ideal for beauty products, food, and anything you want to look approachable and high-end.
Key lighting directions
Where the main light source (the 'key light') comes from dictates the mood and reveals the product's shape.
- Front Lighting: The light is directly in front of the subject. It’s safe but can make objects look flat by removing most shadows.
- Side Lighting: The light comes from the side (typically 45-90 degrees). This is the secret to revealing texture. It rakes across the surface, creating small highlights and shadows that show the material's grain, weave, or finish.
- Backlighting: The light is behind the subject. This creates a bright outline or 'rim light' that separates the product from the background, making it pop. It’s especially effective for translucent objects like drinks or perfume.
Trying to describe these setups in a text prompt is a frustrating guessing game. A better way is to use a tool that has these principles built in.
The template: Building a virtual photo studio in MyUP
This is where you stop being a prompter and start being a creative director. In MyUP, we translate these complex lighting setups into simple, repeatable controls. Instead of you having to write a novel-length prompt, our templates handle the technical details behind the scenes. You just make the creative choices.
For example, a workflow can provide a simple dropdown menu for 'Lighting Style' with options like 'Softbox,' 'Side-lit,' or 'Backlit.' You select one, and MyUP generates the image with the correct lighting characteristics. The human validates the result; MyUP handles the production.
This approach gives you both control and consistency. To get a clean, elegant shot perfect for e-commerce or a social media post, the following template is the ideal starting point. It's designed around soft, flattering light and a minimalist aesthetic that makes the product the hero.
Workflow code: #myup-fy77-jljs
Minimalist Elegant Product Advertising Poster
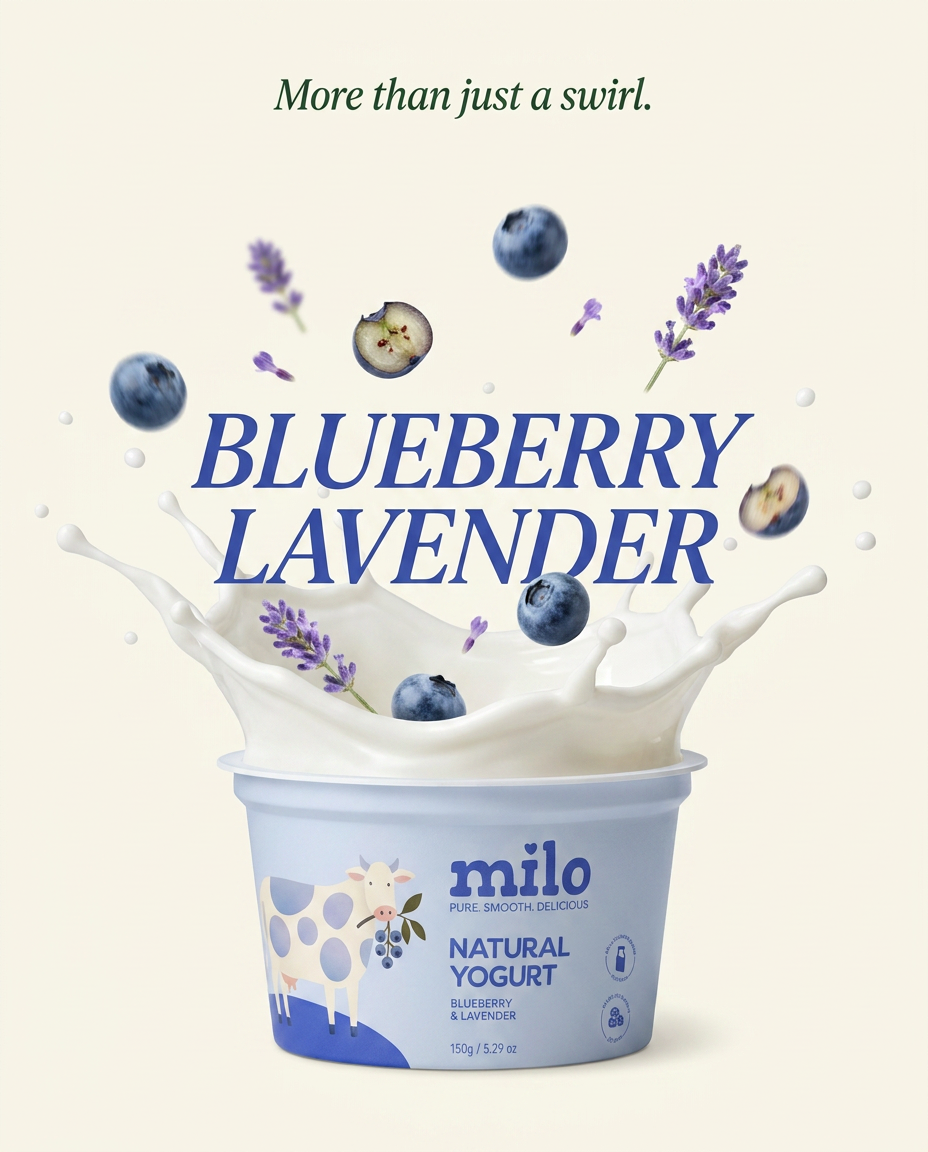
Turn any product shot into a high-end editorial ad. It places your item against a soft cream background with airy spacing and adds elegant, small serif typography at the top. Great for wellness or luxury brands wanting a calm, minimal aesthetic.
Regenerate using your own assets.
Advanced lighting: Crafting believable shadows and reflections
Once you've mastered the basics of light direction, the next level is controlling how that light interacts with your product's material. This is especially critical for luxury goods, cosmetics, and anything with a reflective surface like glass, metal, or liquid.
A generic AI image might place a reflection on a perfume bottle, but it often looks fake—a flat, pasted-on white square. A truly realistic shot requires the reflection to wrap around the object's curves and subtly reflect a believable environment. Similarly, the shadow shouldn't be a generic gray blob; its softness and direction should correspond logically to the light source.
In MyUP, you can use templates designed specifically for these challenges. These tools incorporate sophisticated prompting for environmental mapping and shadow falloff, giving you rich, believable results. A shot of a luxury perfume, for instance, can be generated with soft highlights that suggest a high-end studio environment, all while casting a gentle, diffused shadow on the surface below. This level of detail turns a simple product shot into a compelling commercial asset.
For creating cinematic, high-end visuals for products like perfume or jewelry, this is the template you need. It's built to handle complex reflections and create a premium, atmospheric mood.
Workflow code: #myup-mvtk-dmtt
Luxury Perfume Brand Commercial Video
Capture a cinematic glow that makes any subject look like a brand icon. This process blends a sharp, low-angle still with a fluid motion sequence to turn your product into the star of a golden hour commercial.
Regenerate using your own assets.
The final shot: From a single image to a consistent catalog
Getting one perfect image is a good start, but brands don't need one image. They need a hundred. They need a full e-commerce catalog, a month's worth of social media content, and a series of campaign ads—all with a consistent visual identity.
This is where controlling light with a system, rather than one-off prompts, becomes a massive advantage. Once you define a lighting setup you love in a MyUP template, you can save it and reuse it for every product in your line. Swap a skincare bottle for a lipstick tube, and the lighting remains identical. The key light, the shadow softness, and the background are all locked in. This ensures your entire product line looks like it was shot by the same photographer in the same studio on the same day.
When you combine this with a MyUP Brandkit—which automatically applies your brand's specific fonts, colors, and logo—you have a complete system for creating on-brand, professional-quality visuals at scale. You're no longer just generating pictures; you're running an AI-powered photoshoot system that delivers consistency every time. This is how you move from experimenting with AI to relying on it for professional creative production.
